
.svg)
.svg)
OPENTRAIN AI DOCUMENTATION
Set up Hubstaff
Accept your Hubstaff invitation through OpenTrain Work Email, install the desktop timer, and verify the connection for your project.
Use this guide when an OpenTrain Project To-do asks you to install and verify Hubstaff. The setup connects your OpenTrain project to the Hubstaff desktop timer.
What you need
Section titled “What you need”- An assigned Install and verify Hubstaff Project To-do
- Access to Work Email inside OpenTrain
- A Windows, macOS, or Linux computer where you can install the Hubstaff desktop application
Set up and verify Hubstaff
Section titled “Set up and verify Hubstaff”Open the Hubstaff Project To-do
Open Ongoing Jobs, select the correct job, and then select Project To-dos. Find Install and verify Hubstaff.
The card shows your invitation and connection status. Use Open Work Email inbox to accept the invitation. If the card includes Open project instructions, use it to open the exact setup page for this job in a new tab while keeping your to-do open.
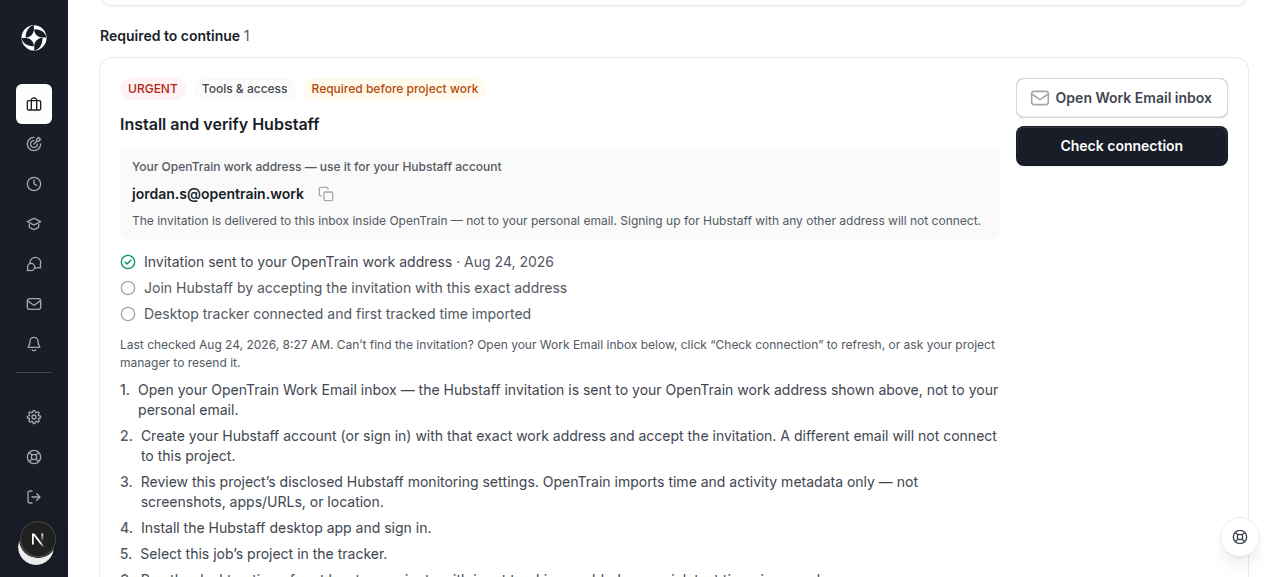
Open the invitation in Work Email
Select Open Work Email inbox. Work Email opens inside OpenTrain; you do not need another email application or a separate Work Email password.
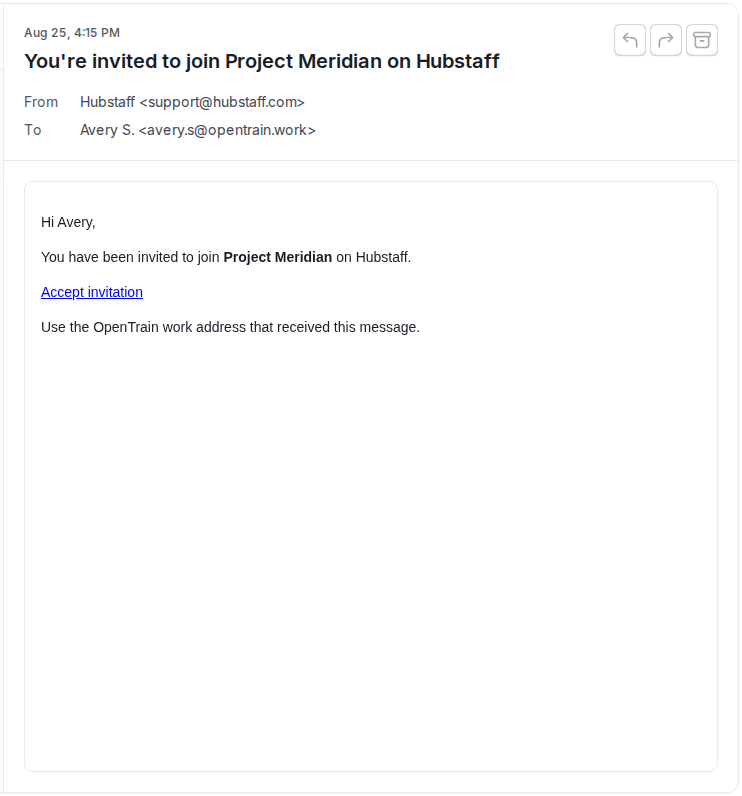
In Inbox, find the message from Hubstaff and select its subject to read it.
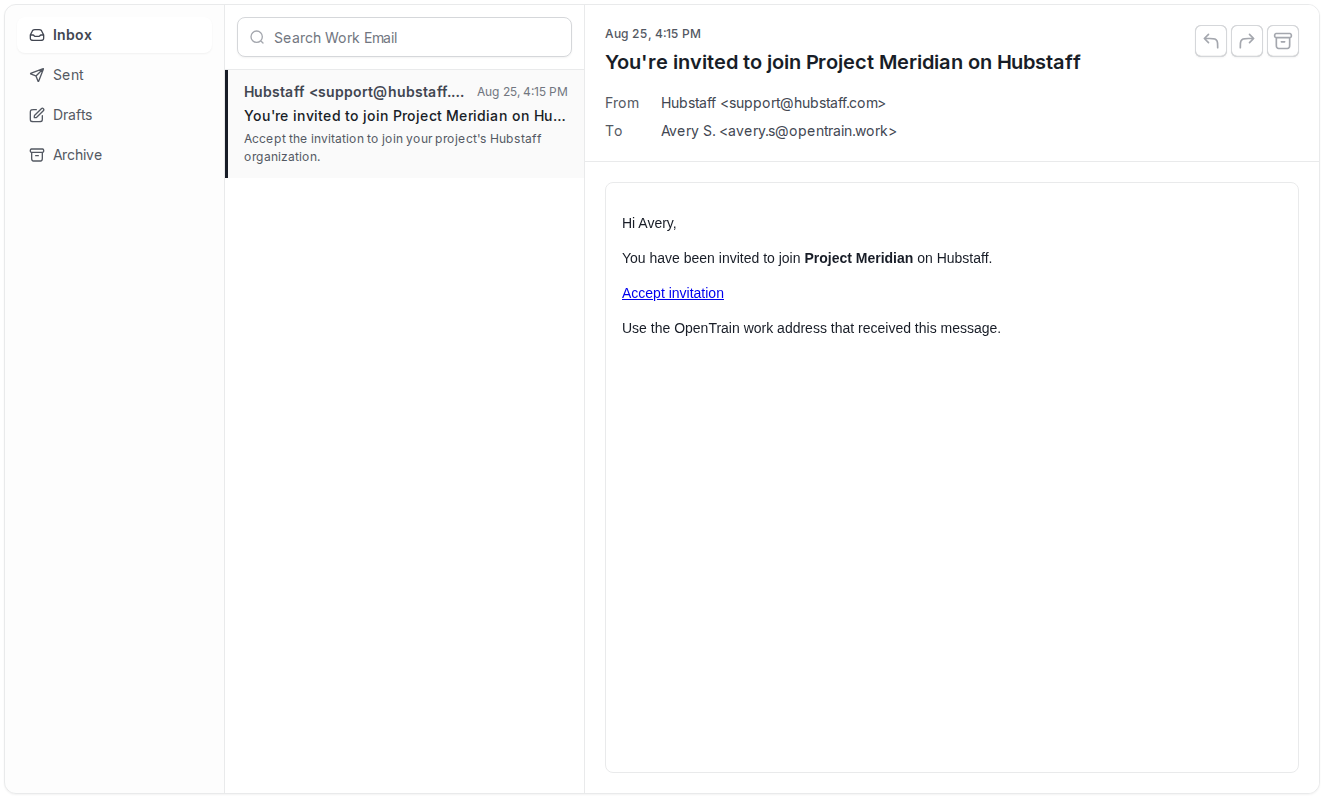
Confirm the project name and sender, then select the invitation action in the email.
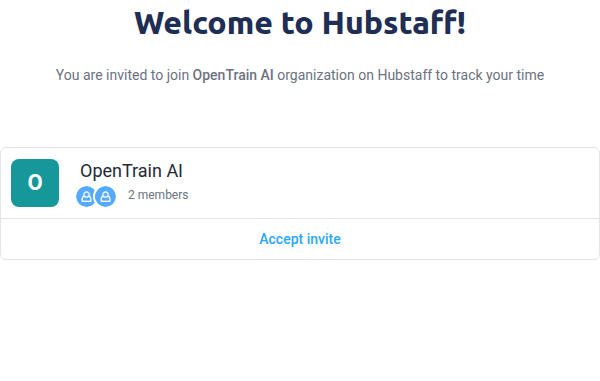
Confirm and accept the OpenTrain AI invitation
The invitation opens a Hubstaff page that says you were invited to join OpenTrain AI. Confirm that organization name, then select Accept invite.
Create your Hubstaff account
If this is your first Hubstaff invitation, Hubstaff opens an invitation-specific account form. Enter your first and last name. Your @opentrain.work address is already filled in from the invitation and should not be changed.
Create a new password for Hubstaff, accept Hubstaff’s terms, and select Create my account.
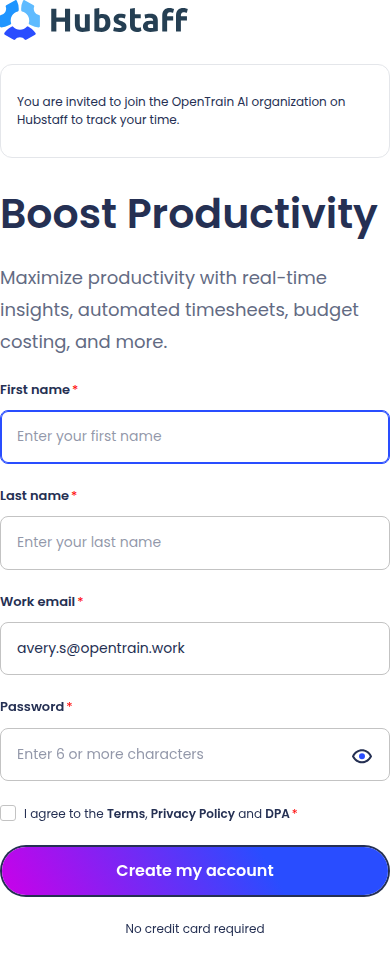
If you already created a Hubstaff account with this same work address, Hubstaff may ask you to sign in instead. Use the Hubstaff password you previously created, or select Forgot your password? to reset it.
Leave Hubstaff's optional introduction
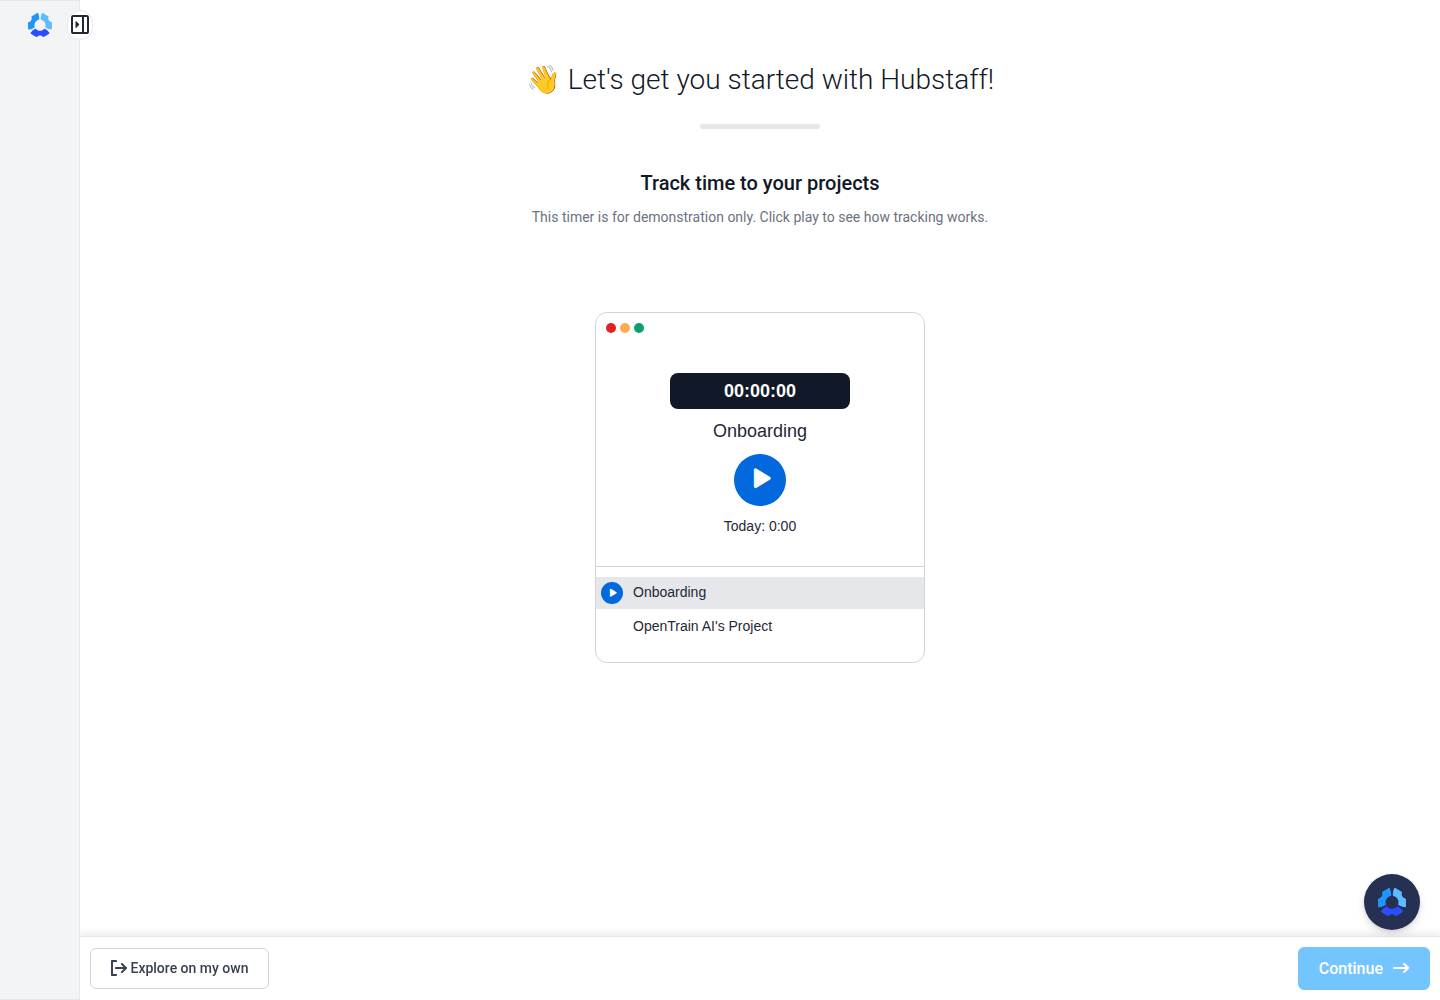
After account creation, Hubstaff may show a short product introduction with a demonstration timer. This is only a Hubstaff walkthrough. It is not your OpenTrain project and does not count as paid or verified project time.
Select Explore on my own to continue directly to your account. You can also complete the walkthrough if you want to learn the interface first.
Review monitoring and install the desktop application
Open the linked Project Instructions page and review the monitoring notice before tracking. Depending on the disclosed settings, Hubstaff can record time, keyboard and mouse activity levels, periodic screenshots, and application or website activity while the timer is running.
If Hubstaff or your operating system asks for screen recording, accessibility, or input-monitoring permission, approve the permissions required by your project’s notice. A Screen Recording permission lets Hubstaff capture the disclosed periodic screenshots while the timer runs; it does not mean Hubstaff records a continuous video of your screen.
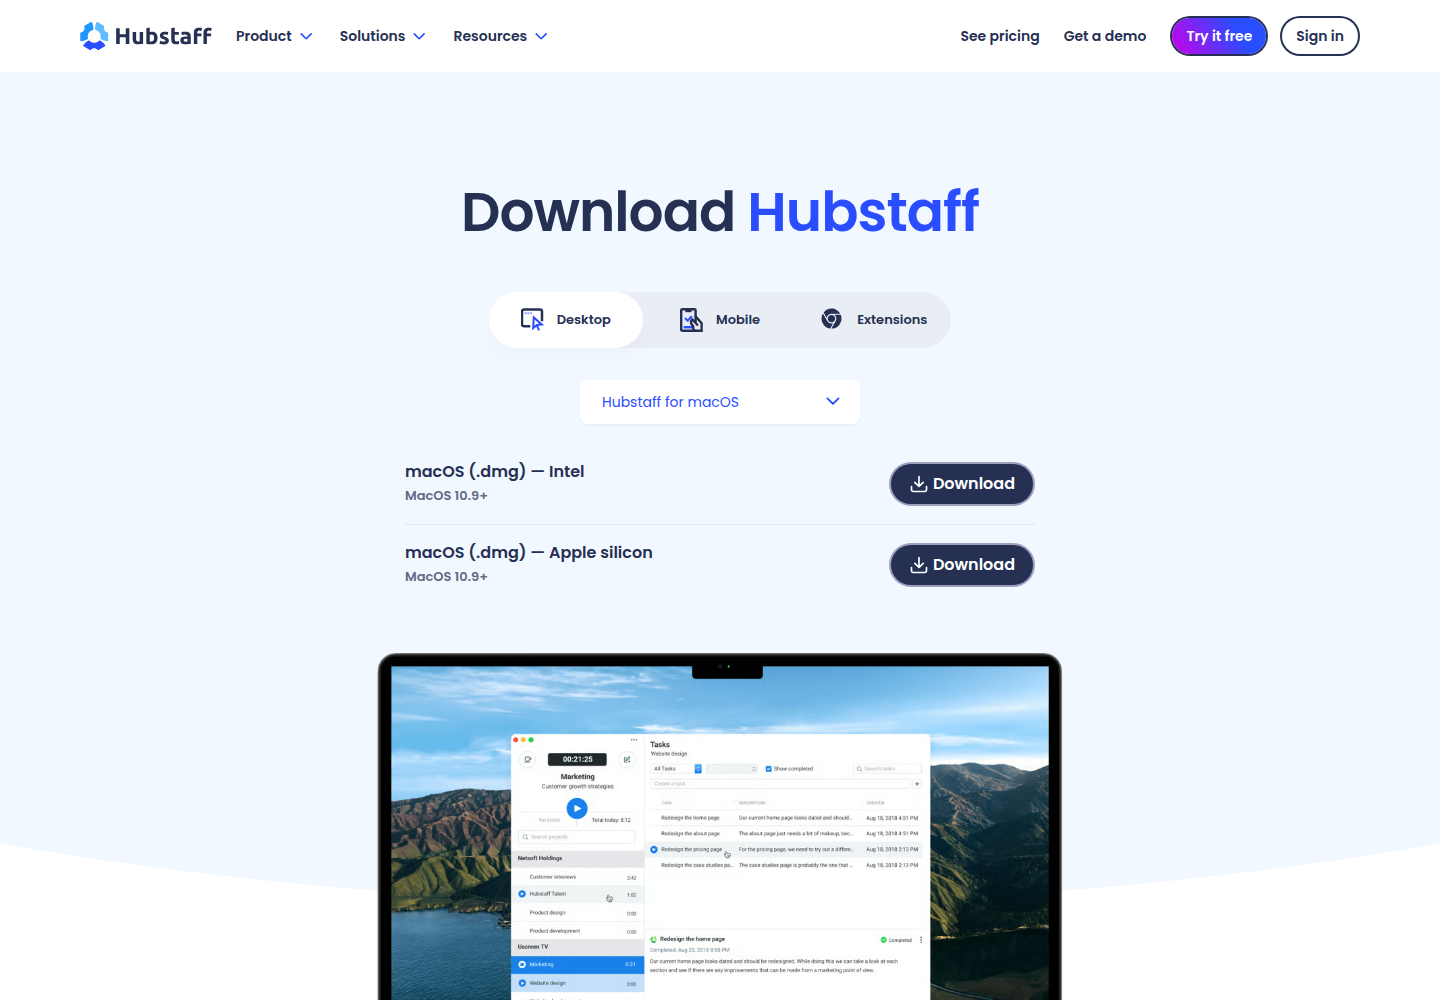
Download and install the Hubstaff desktop application. Then sign in with the account connected to your OpenTrain Work Email invitation.
On Hubstaff’s download page, keep Desktop selected, choose your operating system, and select Download. The page normally detects your computer automatically; use the operating-system menu if it selects the wrong one.
Sign in to the Hubstaff desktop application
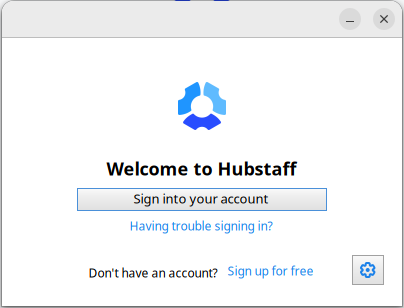
Open the installed Hubstaff desktop application and select Sign into your account. Hubstaff opens its secure sign-in in your browser.
Sign in with:
- Email: the full
@opentrain.workaddress that received the invitation - Password: the Hubstaff password you created in step 4
If the browser is still signed in from account creation, Hubstaff may approve the desktop application without asking for the password again.
Run the two-minute connection test
Open the Hubstaff desktop application and select Refresh in the bottom-left corner. Stay in the Projects view, find the project associated with your OpenTrain job, and select the small Play button directly beside the project name.
Do not open the task pane, create a task, or use a task-level timer. If Hubstaff asks you to select a task, return to the Projects view and use the Play button beside the project name instead.
Keep the desktop timer running for at least two full minutes while doing the permitted setup or training activity and using your keyboard or mouse normally. Then stop the timer.
The web timer and manually entered time do not provide the desktop activity needed for OpenTrain’s installation check.
Return to OpenTrain and check the connection
Return to the Install and verify Hubstaff card and select Check connection.
Hubstaff can take up to 20 minutes to publish new activity. If the card still shows a pending connection, wait and select Check connection again. The to-do completes automatically after OpenTrain confirms that you joined the correct project and received input-enabled time from the desktop application.
Track project time after setup
Section titled “Track project time after setup”For each work session:
- Open the Hubstaff desktop application.
- Select Refresh if the project list may be out of date.
- Find the project associated with your OpenTrain job in the Projects view.
- Select the Play button directly beside the project name when you begin the covered project activity.
- Stop the timer when you finish or take a non-working break.
- Follow any additional time-submission or approval instructions provided by the project team.
Track time only for assigned training and authorized project work covered by your job’s Project Instructions. Stop the timer for non-working breaks, idle or waiting time, personal activity, and any work you have not been assigned.
If you forget to start the timer, do not leave it running longer later and do not add manual time unless the project team specifically tells you to. Message the project team with the date, approximate time, and activity so they can tell you the correct recovery process.
Troubleshooting
Section titled “Troubleshooting”I cannot find the Hubstaff invitation
Open Work Email, select Inbox, search for Hubstaff, and select Refresh. Check Archive as well. If the invitation is still missing, ask the project manager to check or resend your assignment.
Hubstaff says the invitation belongs to another account
Sign out of the Hubstaff account currently open in your browser. Return to OpenTrain Work Email, reopen the invitation, and continue with the @opentrain.work address shown in your Project To-do.
The project does not appear in the desktop application
Confirm that you accepted the invitation and signed in with the same OpenTrain work address. Sign out and back in to refresh the project list. If it is still missing, contact the project manager.
Hubstaff asks me to select a task
Return to the desktop application’s Projects view and select Refresh in the bottom-left corner. Find the correct project, then select the small Play button directly beside the project name. Do not open the task pane or create a task unless your project instructions explicitly require one.
If there is no Play button beside the correct project, capture the entire Hubstaff desktop application window and contact the project manager.
I accidentally tracked the wrong Hubstaff project
Stop the timer as soon as you notice. Do not try to offset the mistake by tracking extra time elsewhere. Message the project team with the date, approximate start and stop times, the project you selected, and the project you intended to select. Follow their correction instructions before adding or editing time.
I forgot to start the timer
Do not keep a later timer running to make up the difference. Do not add manual time unless the project team explicitly authorizes it. Message the project team with the date, approximate missed time, and the assigned activity you completed, then wait for their instructions.
Hubstaff asks for screen recording or input permission
Compare the prompt with the monitoring notice in your job’s Project Instructions. If it matches, approve the required permission in your operating-system settings and restart Hubstaff if prompted. Screen Recording allows the disclosed periodic screenshots while the timer is running; it is not continuous video. If the requested permission is not disclosed, stop and contact the project team before tracking.
Check connection still says setup is pending
Confirm that you used the desktop application, selected the Play button beside the correct project, enabled the disclosed input permissions, and recorded at least two full minutes of permitted activity. Wait up to 20 minutes for Hubstaff to publish the activity, then select Check connection again.
I cannot install or run the desktop application
Review Hubstaff’s quick-start guide and installation instructions for your operating system. If a managed computer prevents installation or permissions, contact the project manager before beginning training or project work.