
Documentation Index

Fetch the complete documentation index at: https://www.opentrain.ai/docs/llms.txt

Use this file to discover all available pages before exploring further.

Your profile is how employers find you and how the matching engine ranks you for jobs. A complete profile with specific labeling experience gets surfaced more often and to better-matched opportunities. You can access the profile wizard from Settings → Profile in your AI trainer dashboard. You can return to it any time to update your information.
1

Upload your resume

The first step uploads your resume so the platform can auto-fill your profile. Two resume types are supported:
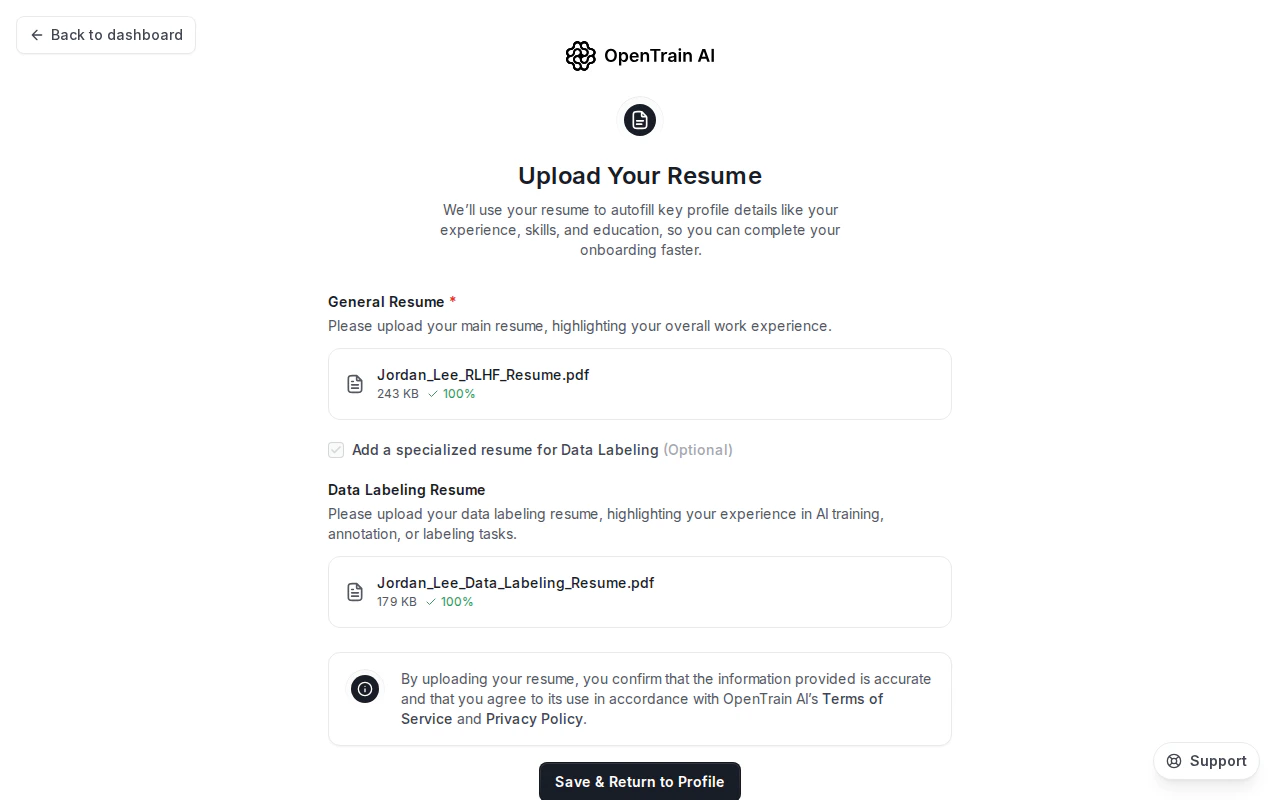
  • General resume (required) — your overall work history and background
  • Data labeling resume (optional) — a separate resume focused on annotation, RLHF, or labeling-specific experience
Accepted formats: PDF, DOCX, or TXT — max 10 MB each.When you upload your general resume, the platform parses it and pre-populates your work history, education, skills, and contact details. You review and edit each section in the steps that follow.
The Upload Your Resume wizard step with a General Resume card showing Jordan_Lee_RLHF_Resume.pdf at 243 KB with a green 100% verification badge, plus a checked 'Add a specialized resume for Data Labeling' option that reveals a Data Labeling Resume card showing Jordan_Lee_Data_Labeling_Resume.pdf at 179 KB.
If you upload a second resume later, the platform cross-checks it against your original to verify consistency. Significant mismatches may affect your profile status.
2

Add your basic details

Fill in your contact and location information:
  • Full name
  • Country — used for location-based job matching and payout eligibility
  • City
  • Phone number
  • LinkedIn URL — the platform normalizes your URL automatically
Your country determines which jobs you are eligible to apply for when an employer restricts their listing to specific locations.
3

Add your labeling experience

This is the most important section for job matching. The step has two pages.On the first page, pick your overall AI training experience level — Entry Level (less than 1 year), Intermediate (1–3 years), or Expert (3+ years). On the second page you write a short Profile Overview (minimum 150 characters) and add one or more labeling experience entries. For each entry, the wizard captures:
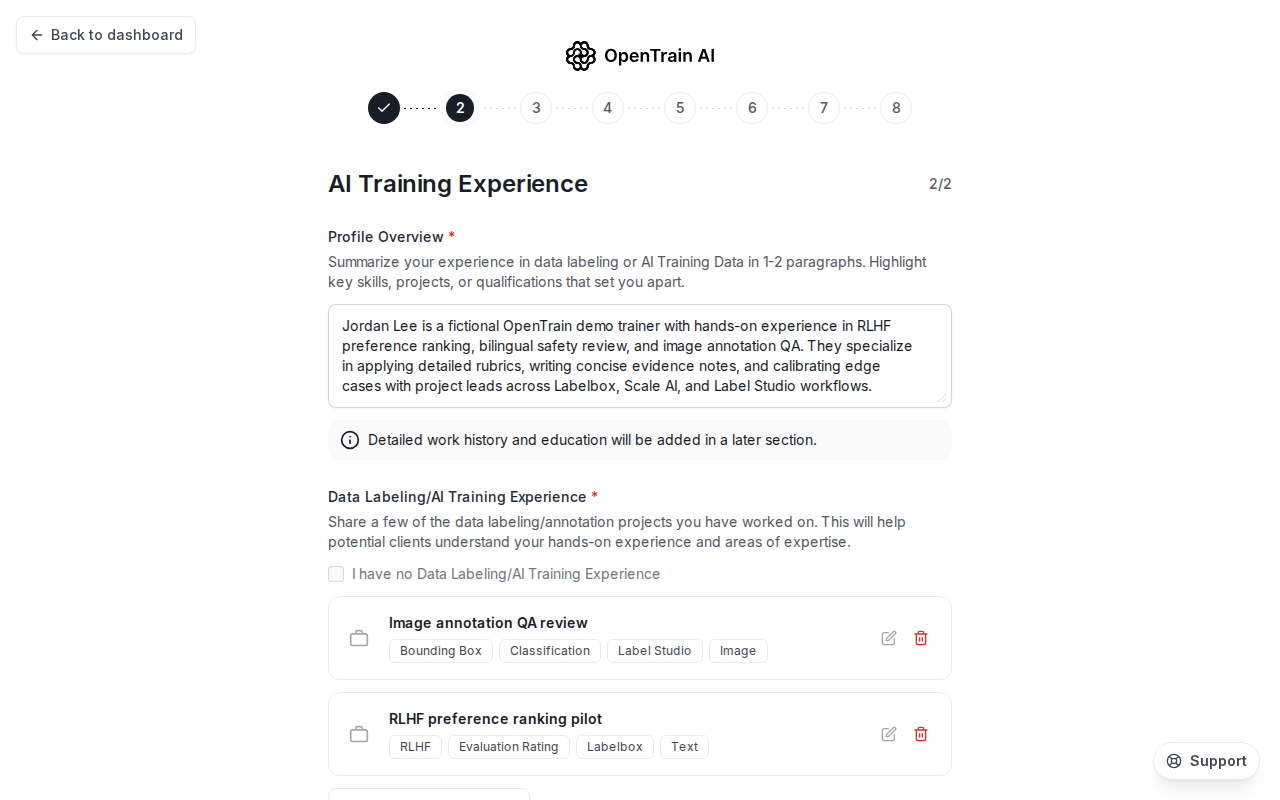
  • Platform or tool used (e.g., Scale AI, Labelbox, CVAT, Appen, Remotasks, or internal tooling)
  • Data types you worked with — image, video, text, audio, document, code, 3D sensor, medical, geospatial
  • Label types you performed — bounding box, polygon, segmentation, classification, NER, RLHF, fine-tuning, SFT, red-teaming, transcription, evaluation/rating, and more
  • Duration and dates
Page 2 of 2 of the AI Training Experience wizard step. A Profile Overview textarea contains a multi-sentence summary above the 150-character minimum. Below it, two labeling experience cards are listed: 'Image annotation QA review' tagged Bounding Box, Classification, Label Studio, Image; and 'RLHF preference ranking pilot' tagged RLHF, Evaluation Rating, Labelbox, Text. Each card has edit and delete buttons on the right.
Add a separate entry for each platform or tool you have used, even if the work overlapped in time. Employers often filter by specific software, and having each tool listed individually improves your match quality.
4

Set your skills

The skills section captures three dimensions that the matching engine uses:
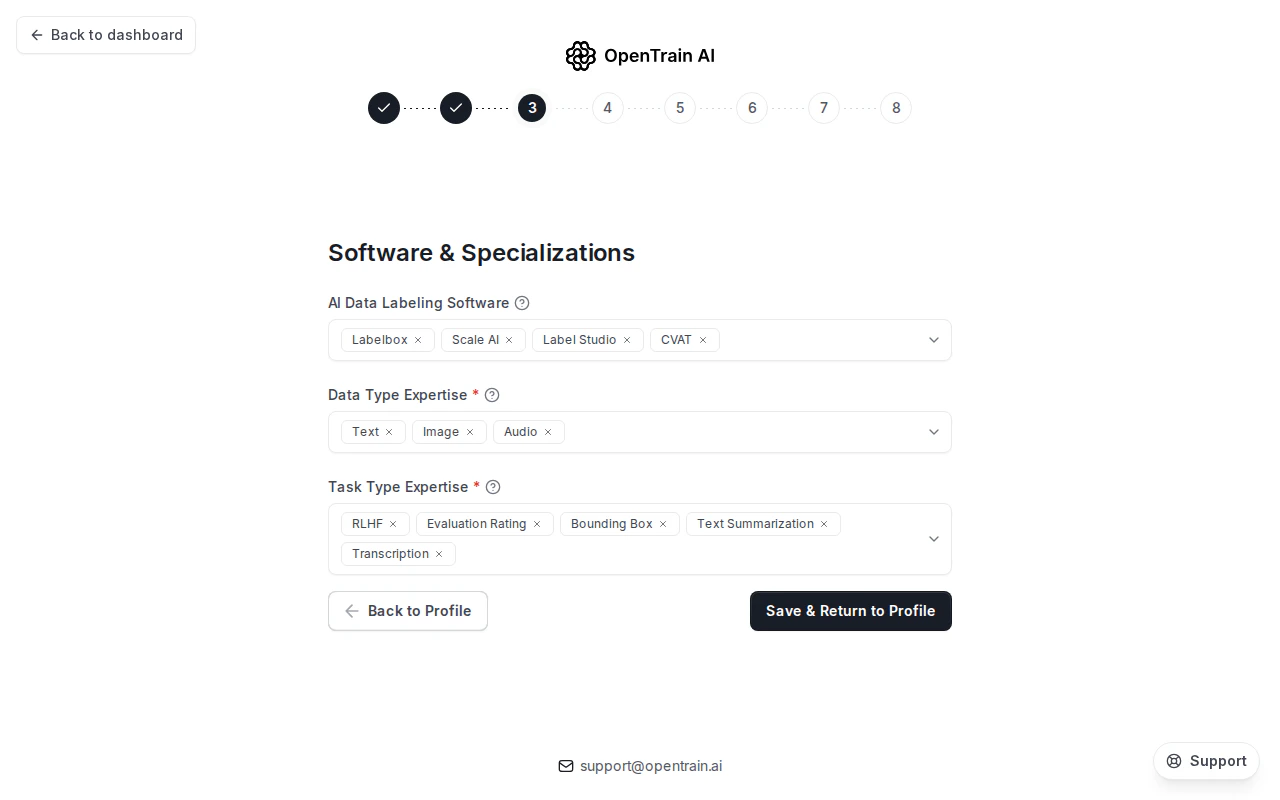
  • AI Data Labeling Software — select every labeling or annotation platform you have hands-on experience with (Scale AI, Labelbox, Label Studio, Encord, Roboflow, AWS SageMaker, CVAT, etc.)
  • Data Type Expertise — the types of data you are comfortable annotating
  • Task Type Expertise — the annotation and training task types you can perform
These overlap with your labeling experience entries but apply platform-wide across all your work, not just a single project.
The Software & Specializations wizard step with three labelled chip strips. AI Data Labeling Software shows Labelbox, Scale AI, Label Studio, and CVAT. Data Type Expertise shows Text, Image, and Audio. Task Type Expertise shows RLHF, Evaluation Rating, Bounding Box, Text Summarization, and Transcription.
5

Add work experience

Add your general professional work history — roles, companies, dates, and descriptions. The resume parser auto-populates these from your uploaded resume, but you can add, edit, or remove entries manually.This section is separate from labeling experience and covers non-AI-training roles in your background.
6

Add education

Add your education history — school, degree, field of study, and graduation year. The resume parser auto-populates these as well.
7

Set your rate and availability

Set your hourly rate and weekly availability. Availability options are:
  • Less than 20 hrs/week
  • 20+ hrs/week
  • I don’t know yet
Experience level options (used for job matching):
  • Entry Level — less than 1 year of AI training experience
  • Intermediate — 1–3 years
  • Expert — 3+ years of data labeling or annotation experience
8

Set up your public profile

The wizard’s final personalization step captures three fields:
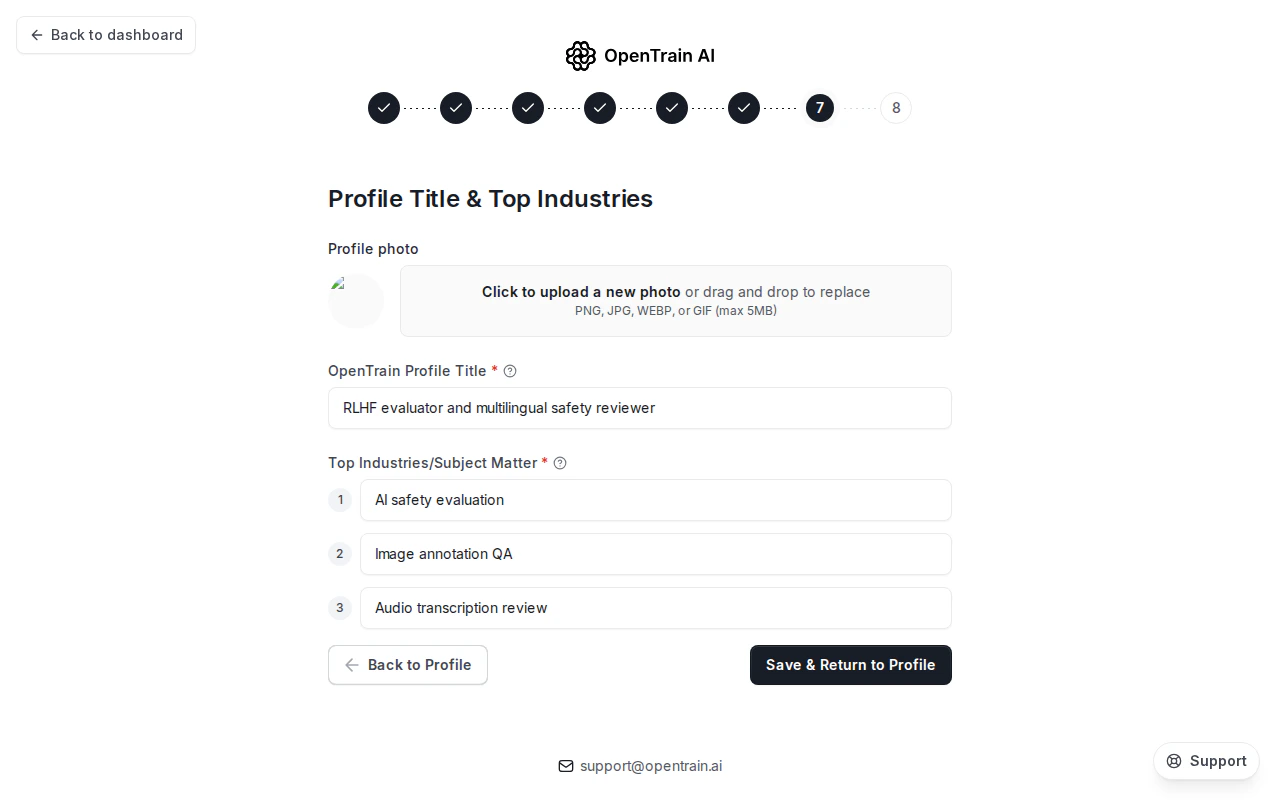
  • Profile photo — upload a photo to display on your profile card and proposals (PNG, JPG, WEBP, or GIF, max 5 MB)
  • Profile title — a short headline that appears on your public profile, such as “RLHF evaluator and multilingual safety reviewer”
  • Top industries / subject matter — rank up to three areas that best represent your expertise (for example, AI safety evaluation, image annotation QA, or audio transcription review)
The Profile Title & Top Industries wizard step. A profile photo upload card sits at the top. Below it, the OpenTrain Profile Title field reads 'RLHF evaluator and multilingual safety reviewer'. Three numbered Top Industries/Subject Matter slots are filled with 'AI safety evaluation', 'Image annotation QA', and 'Audio transcription review'.
9

Review and submit

The final step shows a summary of everything you have filled in. Review each section and go back to correct anything before submitting.Once you submit your profile, it is added to the matching pool and you can start applying to jobs.

Profile visibility

Your profile visibility and availability settings live in Settings → Profile, not in the onboarding wizard. You can update them any time from your AI trainer dashboard.
  • Visibility — controls who can see your profile: Public, Only OpenTrain Users, or Private
  • Availability — signals to employers whether you are open to new work (Less than 20 hrs/week, 20+ hrs/week, or I don’t know yet)
  • Search engine visibility — when enabled, allows search engines such as Google to index your public profile page
The Settings page with the Profile tab selected. A card labelled 'Profile' with the description 'Manage your availability and visibility on OpenTrain' contains a Visibility dropdown set to 'Only OpenTrain Users', an Availability dropdown set to 'I don't know yet', and a disabled Search engine visibility toggle with the label 'Allow search engines like Google to show your profile in search results'.

Languages

Add the languages you speak and your proficiency level for each (Native/Bilingual, Fluent, Conversational, or Basic). Language is a primary matching factor for many jobs — especially translation, localization review, and multilingual annotation work.

Agency onboarding

If you represent a team of AI trainers rather than working solo, use the Agency onboarding flow from your dashboard. This creates a company-level profile that covers your team’s headcount, security and compliance credentials, and pricing. Agency accounts have access to subscription plans that control job visibility and the number of team members who can apply. The Free plan has restricted access — upgrade to Basic or Pro to unlock the full job feed.
Even as an agency, individual team members should complete their own AI trainer profiles. Employer proposals and contracts are tied to individual accounts.